First Published: November 22, 2021 in The People’s Paper – Article Link
Live edge epoxy river tables are sweeping the globe in popularity! These stunning tables are extremely desirable as a DIY hobby—and a rapidly growing enterprise for some entrepreneurs. Epoxy river tables are a type of hybrid indoor furniture constructed from natural wood—typically live (rough) edge slabs with epoxy resin flowing through the middle. The live edge of the wood is turned inward so that it simulates the contours of a river. River tables have exploded in popularity since 2019. They appeal to a wide range of people—especially wood furniture lovers and people who prefer the striking modern style.
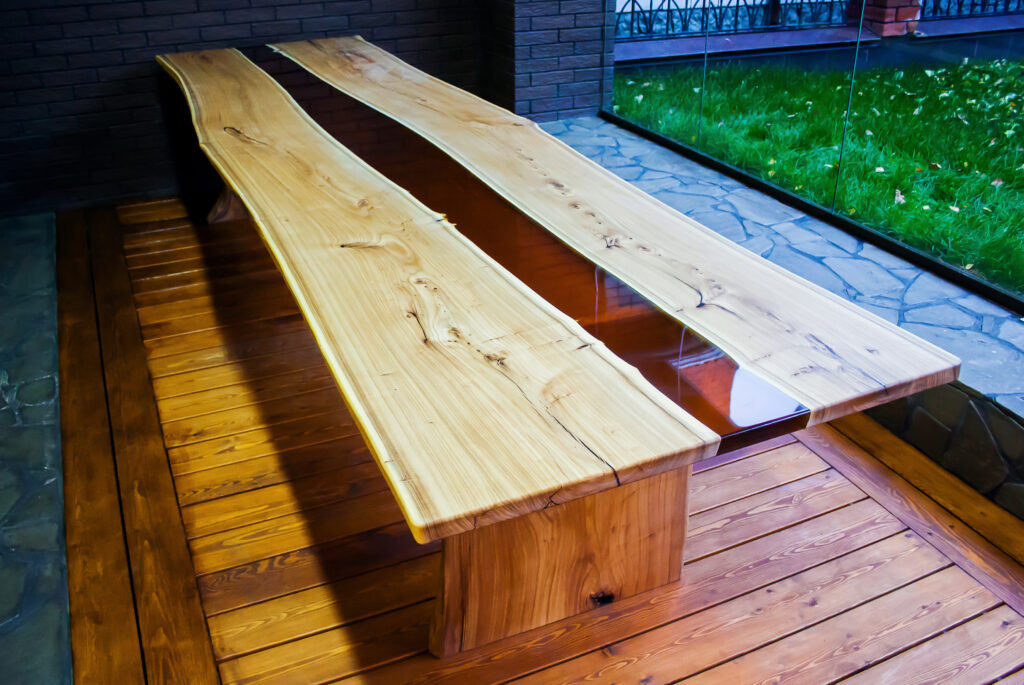
Each table is unique and customizable to a wide range of tastes and colors. Epoxy river tables sell for between $1,000 up to $10,000 depending on the wood used, the size of the table and other factors.
These tables were first made popular by the furniture maker, Greg Klassen, credited with creating the river table. Greg is based in the Pacific Northwest and sends his creations all over the world. The river table is inspired by natural landscapes and topography. The name comes from the idea that it looks as though a river is flowing through two natural pieces of wood that resemble riverbanks.
DIY enthusiasts all over the world now create these River Tables in their home garages and shops. There are several important factors to consider when choosing the supplies needed. You will need two different epoxies to complete your table: (1) Deep Pour or Casting Epoxy will be needed to create the river. Deep pour epoxy can be applied in a much thicker layer than standard epoxy. (2) A topcoat epoxy is needed to provide a final coat over your tabletop. Once your epoxy river table has been cast and cured, applying a final topcoat provides a valuable protective layer. The Topcoat Epoxy needs to be durable and scratch resistant once cured.
There are a few things to look for in an epoxy resin. UV inhibitors will help prevent your resin from ambering (yellowing) from sunlight exposure. Resins that emit no volatile organic compounds (VOCs) will produce less odor. This is sometimes referred to as 100% Solids Epoxy. This means that no solvents were used in the product—that reduces VOCs. A resin that is self-leveling will automatically level itself out once poured. This is useful for river tables.
The standard method for pouring a river table requires a dam or mold be constructed. This keeps the deep pour epoxy from running out when poured—an expensive mistake to fix! Constructing the dam or frame must be done carefully to ensure the epoxy table can be removed after the epoxy is cured. One method is to apply Epoxy Mold Release Tape to your surfaces to ensure the epoxy won’t bond to it. Press the tape inside around the entire dam. The tape should stick up at least a half-inch. One continuous piece of tape may be difficult to achieve but aim for as few seams as possible. You will also want to caulk your seams between your boards to keep epoxy from flowing out. You can use clear silicone caulking for this to allow for easier removal later on.
Your mold or dam can contribute to heat retention in your epoxy. The deeper an epoxy pour is, the more heat generated. Molds made from thick lumber can retain heat and make overheating and cracking more likely to occur. Try to use materials that shed heat easier like Melamine Board, HDPE Plastics or Medium Density Fiberboard (MDF). Look for other ways to shed heat like elevating your mold box and using a fan to generate airflow underneath and around it.
Tips:
- Carefully READ all Product Instructions before starting any epoxy project.
- Pay attention to the product’s pot life or working time. Once mixed, this is how much time you have before the epoxy hardens and becomes unworkable.
- Epoxy should be poured in a room maintained at 70°F – 75°F. Refer to Product Instructions.
- Ensure your workspace is dust, dirt, and insect free.
- Apply a thin layer of epoxy to all your wooden surfaces to seal it first. This is referred to as a seal coat and will reduce bubbles when you do your thicker Deep Pour layer.
- You can pop any bubbles after pouring by lightly using a torch or electric heat gun across the surface.
- If you are pouring layers of epoxy AFTER your recoat window has expired (see Product Instructions), lightly sand the epoxy surface before you apply the next coat. This will help it to bond better with the previous layer.
- Let your project fully cure for at least 72 hours to keep the surface from being scratched easily.
- Never mix epoxy with nor apply it on an oil-based product.
- Remember PPE: Safety Glasses, Disposable Gloves, Protective Clothing, Respirator or Mask
Contact us today to learn more about your options. We have a full epoxy resin line available for DIY projects. Call us at (907) 671-9900 or visit us at 201 E. Swanson Ave. Suite #1, Wasilla.